I Broke a Mold During Lens Production

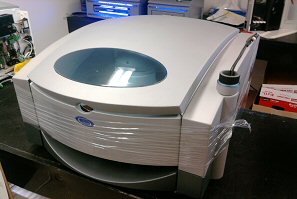
The Q-2100 Lens system utilizes digital free form crown glass molds during the lens production process.  There is an infrequent possibility that a mold may break during production. Use the following tips to diagnose the reason.

Mold Breakage During the Demolding Process

Possible Cause #1: Mold was directly placed into the soaking solution before one mold was separated from the mold assembly and while still hot. This can cause thermal shock to the mold.

Solution: Demold one of the molds from the mold assembly prior to placing in the Q-Soak solution

Possible Cause #2: Improper technique when using the demolding tool

Solution: The operator needs to pry (not twist) the molds apart with the proper Optical Dynamics demolding tool. If the operator twists the demolding tool the corners of the tool may have stressed the mold to break or chip.

Mold Breakage Inside the Post Cure Chamber

Possible Cause: The mold assembly may not have been processed in a timely manner.

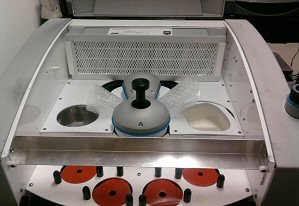
Solution: Ensure that the mold assembly is immediately placed into the Post Cure chamber after the initial does of light in the Main Chamber.

For additional technical support, please call the Bob’s at 800-797-2743 ext. 276 or ext. 283
 

Flash Fill Stand Maintenance

Cleaning the fill stand

  1. Clean any monomer spills and overflows immediately
  2. Wipe off the bottom of the valve at the end of every

Flash Fill Stand Trouble Shooting

No power to the fill stand

  1. Make sure the unit is plugged in and the power switch is on
  2. Check the fuses in the back of the unit

3. Call the Optical Dynamics Service Department 800-587-2743

Fill stand does not heat properly

  1. Make sure the unit is plugged in and the power switch is on
  2. Check the fuses in the back of the fill stand
  3. Call the Optical Dynamics Service Department 800-587-2743

Monomer leaking from the valve

  1. Make sure the valve is completely closed
  2. Remove the valve knob by twisting counter clockwise and pulling
  3. Make sure the two rubber gaskets are seated inside the valve needed opening
  4. Clean valve knob with IPA and lint free cloth
  5. Call the Optical Dynamics Service Department 800-587-2743

Oops, I mixed different monomers

  1. Turn unit off immediately
  2. Call the Optical Dynamics Service Department 800-587-2743


Split Job Curing Cycle

Some prescriptions will use different initialization cycles for each eye. The Q-2100 screen will show the word SPLIT when this occurs.


Split jobs require a few extra steps to complete them correctly. Fill both mold assemblies as usual and put them in the initial curing drawer with the fill port up. Press the CURE button once and the box just above the button will direct you to check for correct filter placement. Check the filters and continue when they are correctly placed.


Press the CURE  button a second time and the box will direct you to start curing the left or right assembly. The alert tone will sound when the first assembly has finished the initialization step.  Remove it and place it in the post cure station and press the POST CURE button. Place the second mold cavity in the initialization drawer of the main chamber on the proper side and press CURE to start the initialization cycle for the second assembly.

The tone will sound again when the second mold assembly is ready to be moved to the post cure station. Move the mold assembly from the main chamber to the empty post cure location in the post cure drawer. Press the POST CURE button again to stop the alert tone and continue the post cure cycle for the two cavities. The two assemblies will finish their curing cycles together. The tone will sound again when the post cure cycle is complete.

Demolding and annealing for split jobs are the same as any other job.

A Lens Fell into My Post Cure

Don’t worry, if a lens falls into the post cure oven, follow these simple steps to remove it.

Immediately turn off the machine.

Disconnect all power and data cables from the post cure unit

Remove the fill stand set it aside

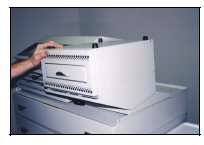
Tilt the post cure unit onto its back

Turn the machine around so that the fill stand plate is facing you

Tilt machine toward you and set the machine upside show on the fill stand plate with the drawer facing you

Tilt the unit toward you so that the drawer faces the floor

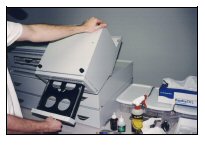
Open the drawer and gently shake the unit if necessary

The lens should fall out


Understanding the Service Help Screen on your Q-2100: Codes 07, 08, 09, 10

Each line in the menu is designed to display problems for specific machine functions. When the machine cannot accomplish a function it will indicate SERVICE on that particular line.

07 Lamp Temperature

Cause: One of the lamp sections is generating too much heat

Response: (1) Follow the instructions given by the machine. (2) For any further information or if parts need to be ordered call Optical Dynamics Technical Support for further information 800-587-2743.

08 Line Voltage

Cause: Electricity is not reaching all of the components of the Q-2100

Response: (1) Follow the instructions given by the machine. (2) Make sure all power cords are securely connects. (3) For any further information or if parts need to be ordered call Optical Dynamics Technical Support 800-587-2743.

09 Communication

Cause: A communication error occurred between the Post Cure unit and one of the other system components.

Response: (1) Follow the instructions given by the machine. (2) For any further information or if parts need to be ordered call Optical Dynamics 800-587-2743.

10 Replace Hood Filter

Cause: The effective life of the air filter in the Main Chamber hood is expired. The filter must be replaced.

Response: (1) Follow the instructions given by the machine. (2) For any further information or if parts need to be ordered call Optical Dynamics 800-587-2743.