Help, How Do I Get Monomer Out of My Clothes?

First, don’t worry…it will usually come out if you treat it properly before washing. Take it from someone who spends a lot of mixing newmonomers, here is what to do:

1) Blot up any monomer you can from the area to keep it from spreading and limit its ability to cure (it doesn’t cure as easily when there’s less of it). Don’t spend a bunch of time in the sun with monomer-soaked clothes either. Sunlight cures it, and once it’s hardened it’s not coming out. Room light and short periods outside aren’t typically a problem.

2) Locate a bottle/stick of Shout Ultra Gel (it’s the one with the little scrub brush built into the top of the bottle). Make sure it says you can wait up to a week to wash the item after treating a stain.

3) Thoroughly saturate the spot with Shout and scrub it a little. Make sure it penetrates the fabric well. If the garment is thick, apply from the inside too.

4) DO NOT wash it immediately. You can wait up to a week, so give it some time to work on the monomer – a couple days at least.

5) Wash normally

Washing MachineOther stain removers might work too, but Shout is the one I’ve used to save a bunch of clothes over the years. I think being able to leave the ultra concentrated version on for quite a while before washing really helps.

On a related note, photochromic clothes do sound kind of fun until you walk outside and realize you look like a horror movie extra because your nice white shirt has concentrated red photochromic goop smeared on it. It took a couple treatment/wash cycles to fix that one, but Shout rescued it too.

Flash Fill Stand Maintenance

Cleaning the fill stand

  1. Clean any monomer spills and overflows immediately
  2. Wipe off the bottom of the valve at the end of every

Flash Fill Stand Trouble Shooting

No power to the fill stand

  1. Make sure the unit is plugged in and the power switch is on
  2. Check the fuses in the back of the unit

3. Call the Optical Dynamics Service Department 800-587-2743

Fill stand does not heat properly

  1. Make sure the unit is plugged in and the power switch is on
  2. Check the fuses in the back of the fill stand
  3. Call the Optical Dynamics Service Department 800-587-2743

Monomer leaking from the valve

  1. Make sure the valve is completely closed
  2. Remove the valve knob by twisting counter clockwise and pulling
  3. Make sure the two rubber gaskets are seated inside the valve needed opening
  4. Clean valve knob with IPA and lint free cloth
  5. Call the Optical Dynamics Service Department 800-587-2743

Oops, I mixed different monomers

  1. Turn unit off immediately
  2. Call the Optical Dynamics Service Department 800-587-2743


Split Job Curing Cycle

Some prescriptions will use different initialization cycles for each eye. The Q-2100 screen will show the word SPLIT when this occurs.


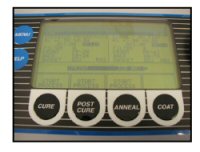
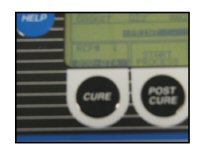
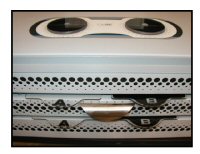
Split jobs require a few extra steps to complete them correctly. Fill both mold assemblies as usual and put them in the initial curing drawer with the fill port up. Press the CURE button once and the box just above the button will direct you to check for correct filter placement. Check the filters and continue when they are correctly placed.


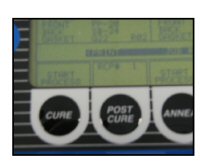
Press the CURE  button a second time and the box will direct you to start curing the left or right assembly. The alert tone will sound when the first assembly has finished the initialization step.  Remove it and place it in the post cure station and press the POST CURE button. Place the second mold cavity in the initialization drawer of the main chamber on the proper side and press CURE to start the initialization cycle for the second assembly.

The tone will sound again when the second mold assembly is ready to be moved to the post cure station. Move the mold assembly from the main chamber to the empty post cure location in the post cure drawer. Press the POST CURE button again to stop the alert tone and continue the post cure cycle for the two cavities. The two assemblies will finish their curing cycles together. The tone will sound again when the post cure cycle is complete.

Demolding and annealing for split jobs are the same as any other job.

Why Can’t I Use Expired nanoCLEAR AR Chemistry?

Since our AR chemistries rely heavily on nanoparticles to give them toughness and the right optical properties, they require a little more care than our other materials. To figure out how long they last we did long-term testing here at high, low, and room temperatures. We also thought about what they’d go through in normal storage and shipping. If you use your AR chemistry by the expiration date we expect your lenses to perform just as ours do here. If it’s past the expiration date or was stored incorrectly things aren’t as predictable.

Spending a long time at extreme temperatures or even just sitting around will eventually cause the nanoparticles to stick together. Once that happens their properties change and so do the coatings that are made with them. Expired chemistry can give you hazy coatings or ones that aren’t nearly as tough as they should be. It can also clog up the dispense filters in your nanoCLEAR unit or cause other coating defects like comets.

If we didn’t have to have an expiration date we wouldn’t use one. At this time nanoparticle-based liquid chemistries of all kinds just tend to have shorter shelf lives than those without them. If we figure out a way around it, you can bet we’ll use it. For now though, the expiration date is something we need.

Can I Use Different Chemicals to Clean My Molds and Lenses?

Cleaning chemicalsIt can be tempting to try to save a few pennies by using industrial chemicals or household cleaners to clean molds and lenses. Unfortunately there’s no way to know exactly what’s in a lot of these cleaners or to be sure that you’ll get the same thing twice even if you buy the same product. “Simple” things like denatured alcohol aren’t safe either; there are hundreds of different denaturing chemicals and processes. How these things will affect the casting process and equipment isn’t easy to predict.

Our cleaners use the minimum number of ingredients necessary to get the job done. There are no colorants or scents added. Since we control the formulations, we also ensure that only high-purity components go in them. It’s the only way we can be sure they will be effective while also being friendly to your molds and lenses. If you stick with our cleaners you don’t have to worry about contaminating your molds, affecting the casting process, or damaging your lens coatings.

Understanding the Service Help Screen on your Q-2100: Codes 07, 08, 09, 10

Each line in the menu is designed to display problems for specific machine functions. When the machine cannot accomplish a function it will indicate SERVICE on that particular line.

07 Lamp Temperature

Cause: One of the lamp sections is generating too much heat

Response: (1) Follow the instructions given by the machine. (2) For any further information or if parts need to be ordered call Optical Dynamics Technical Support for further information 800-587-2743.

08 Line Voltage

Cause: Electricity is not reaching all of the components of the Q-2100

Response: (1) Follow the instructions given by the machine. (2) Make sure all power cords are securely connects. (3) For any further information or if parts need to be ordered call Optical Dynamics Technical Support 800-587-2743.

09 Communication

Cause: A communication error occurred between the Post Cure unit and one of the other system components.

Response: (1) Follow the instructions given by the machine. (2) For any further information or if parts need to be ordered call Optical Dynamics 800-587-2743.

10 Replace Hood Filter

Cause: The effective life of the air filter in the Main Chamber hood is expired. The filter must be replaced.

Response: (1) Follow the instructions given by the machine. (2) For any further information or if parts need to be ordered call Optical Dynamics 800-587-2743.

Is it All About Index?

Simple Answer: No

It’s easy to get swept up in the excitement over a single number: higher index must be better. The simplicity is enticing. As with many technical topics, the reality is that a single performance aspect doesn’t provide enough information to judge true product quality. The idea that a lens with a certain index of refraction is a dead product or the next great thing just isn’t correct.

The More Technical Answer: Still No

If you’re into numbers, beyond index you also have to look at Abbe value, surface smoothness, processing-related deviation from target curves, required center and edge thickness (both for safety and the requirements of the frame it’s going in), lens power, your patient’s tolerance of chromatic dispersion, their eye movement patterns, the conscientiousness and equipment quality of the lab you’re using, etc. If you think it’s a lot to digest, imagine what it’s like for a patient trying to make the right decision.

Back To Simple: What’s the Wearer Say?

If you don’t want to spend the rest of your life trying to understand the minutia of every new lens that comes out, ask the people that have experience with the product. Optical Dynamics lenses have been judged by wearers and experts as some of best lenses they’ve encountered. Whether it’s a single vision or multifocal lens, people are impressed with the clarity and ease of patient adaptation. In the end, that’s really all those technical details are trying to convey anyway. Instead of using a bunch of time trying to decide if “the next great thing” is really that great, using a proven lens that wearers like can be safer and simpler.

The less simple explanation for the high praise we’ve received is that our lenses have exceptionally smooth surfaces, they precisely replicate the digital curves machined into our molds, and they are made from a lightweight, high Abbe polymer. Since the process eliminates the grinding and polishing steps normally used to make a lens, there are far fewer opportunities for machine or operator issues to cause optical problems.

A Fly In the High-Index Soup

The vexing thing about high-index lens materials is that the very people that need them most are also the most likely to experience one of their typical shortcomings. The more extreme the prescription, the more likely it is the wearer will be troubled by chromatic aberration in lower Abbe materials. For the most part, indices around the low 1.6’s are about the current limit on good Abbe performance. If you’re worried about chromatic dispersion, you can’t increase index greatly beyond where Optical Dynamics lenses are, so there’s not much thickness improvement to be gained. There can be significant cost differences though.

So if you have a moderate to low prescription where you don’t need the benefits of a high-index lens, high-index materials work very reliably. Hmmm, not the best story. It’s even less motivating when you think about the center and edge thicknesses required to produce a safe and sturdy lens for today’s rimless frames.

Don’t Just Take Our Word On It

When we say you should be using our lenses, there’s obviously a little bias involved. For a more impartial opinion, here’s what one of our customers has to say about them:

“Over the past couple years I have personally worn some of the “best” custom made progressive lenses available and the optics of the digital lenses from the Q-2100 are as good if not better. I am extremely impressed with the digital lenses the system produces and so are my patients.”

David Holliday, OD – Practicing since 1980 – Q-2100 user since 2000

Proper Sure Seal Application

ONE: Cut lenses to eye size of crib lenses down to remove tacky edges

TWO: To prepare your new Sure Seal tube for application, rotate the handle until you can just see the jelly like coating appear on the top

THREE: Rotate the handle 4 clicks and apply Sure Seal hydrophobic coating to the lens by blotting contents of tube once on front surface. Rotate the handle 4 more clicks and place a blot on the back surface. NOTE: Each application of Sure Seal will require 4 clicks of the handle.

FOUR: Carefully polish the jelly like coating over the entire surface of the lens with a Kimwipe or similar lens tissue until a uniform haze has developed over both the front and back surface. Be sure to recap the Sure Seal tube after use.

FIVE: Place Sure Seal coated lenses in Post Cure annealing oven for 10 minutes.

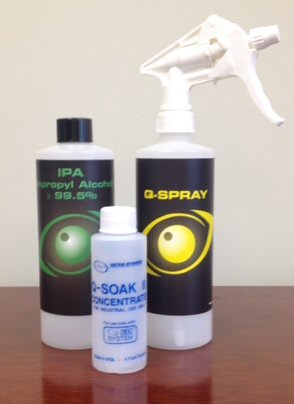
SIX: Upon completion of the 10 minute annealing cycle, wash the pair of lenses with Q-Soak and an AR cloth under hot running water to remove the excess buffed coating.

SEVEN: Clean lenses with Q-Spray

Note: if at any time you observe your hydrophobic coating to become discolored from its original condition, it should be properly disposed of. A new tube should be used at this point. Failure to do so will result in a less than quality product.

nanoCLEAR AR Alarm – Suction Rings?

Topic: My nanoCLEAR AR system was running a job when I received the following message: MOLD DID NOT RELEASE FROM SUCTION, what does this mean?

The Reason Why: The mold the system has just coated is stuck to the suction ring and is not releasing into the mold stage. As you run jobs, costing adheres to the edge of the suction ring which can become sticky making it difficult to release the mold.

The Fix: As part of daily maintenance, the suction ring should be removed at the end of each production day and inspected. If the suction ring shows coating build up, it should be cleaned and scrubbed in your Q-soak tub. The suction ring is a disposable item and should be replaced when coating cannot be easily removed. It is also good practice when placing a new suction ring on your system to clean it with the same process to ensure proper suction with the surface of the mold. Remember to always keep an extra suction ring in inventory so you can pull as needed.

Topic: My mold was going through the coating cycle when I received the following message: MOLD DROPPED DURING CYCLE

The Reason Why: The mold has released from the suction ring during the process as the suction pressure has been compromised.

The Fix: When you remove the suction ring at the end of day to inspect, check for any cracks in the surface of the ring. Overtime, the ring may become cracked, causing the suction ring to lose vacuum pressure. If this is the case, dispose of the old suction ring and replace it with a new ring. As mentioned above, remember to clean the new ring in your Q-soak tub to ensure proper suction. Always keep an extra suction ring in inventory for ongoing production.