nanoCLEAR AR Alarm – Suction Rings?

Topic: My nanoCLEAR AR system was running a job when I received the following message: MOLD DID NOT RELEASE FROM SUCTION, what does this mean?

The Reason Why: The mold the system has just coated is stuck to the suction ring and is not releasing into the mold stage. As you run jobs, costing adheres to the edge of the suction ring which can become sticky making it difficult to release the mold.

The Fix: As part of daily maintenance, the suction ring should be removed at the end of each production day and inspected. If the suction ring shows coating build up, it should be cleaned and scrubbed in your Q-soak tub. The suction ring is a disposable item and should be replaced when coating cannot be easily removed. It is also good practice when placing a new suction ring on your system to clean it with the same process to ensure proper suction with the surface of the mold. Remember to always keep an extra suction ring in inventory so you can pull as needed.

Topic: My mold was going through the coating cycle when I received the following message: MOLD DROPPED DURING CYCLE

The Reason Why: The mold has released from the suction ring during the process as the suction pressure has been compromised.

The Fix: When you remove the suction ring at the end of day to inspect, check for any cracks in the surface of the ring. Overtime, the ring may become cracked, causing the suction ring to lose vacuum pressure. If this is the case, dispose of the old suction ring and replace it with a new ring. As mentioned above, remember to clean the new ring in your Q-soak tub to ensure proper suction. Always keep an extra suction ring in inventory for ongoing production.


How Does My Q-2100™ Compare?

How do i compareHow does my Q-2100 Digital Lens System compare to other in office lens systems?

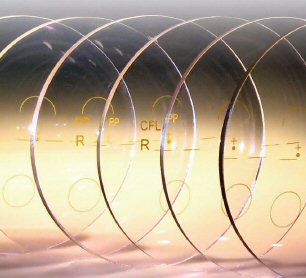
Your Q-2100™ Digital Lens System with nanoCLEAR™ AR delivers proven, quality progressives in regular and short corridor, ASV and FT-28, with market vetted design acceptance and AR performance. Your Q-2100 utilizes digitally mastered reusable crown glass molds that allow you to produce premium index clearLIGHT™ lenses, one of three premium sunSMART™ photochromic varieties, blueVIEW, amplifEYE or five nanoCHROME mirror colors.

With an extensive power range of +4.00 to -6.00/-2.50 cylinder and the optimal use of four base curves, your system will produce a wide range of premium lenses that are on power each and every time. With a Q-2100 system, the more lenses you produce the lower your cost per pair when factoring in the equipment cost. Optical Dynamics’ philosophy has always been the on-going material and coating costs must be as low as possible. You invest in the platform and then maximize profits from the low cost lenses you produced. This provides the best possible return on investment.

Your Q-2100 system maximizes your profits by minimizing the number of items that need to be stocked and reordered. If you have monomer, coating and gaskets you can make any power lens in any design. While you can do the majority of lenses in-office, there are times when you need specialty lenses or out of range Rxs. With support from Vision Dynamics Lab for out of range product, you can keep your patients in the same great materials and designs by ordering uncut lenses at market leading prices. We offer this as a value added benefit for all Q-2100 system owners.

For  practices that want to offer a broad range of lenses, materials and coatings, are interested in dramatically reducing costs and understand the value of over two decades of market success and 150 issued worldwide patents, the Q-2100 is the choice for you.

Mold Cleaning & Storage

Molds normally have residue and flashing on the surface and edges after use. All debris must be removed before the molds can be used again successfully. Clean molds must be stored properly to ensure mold safety while not in use. Additionally, proper mold storage simplifies the picking process when the mold is needed again.

Mold should be left in the soaking containers for at least 5 minutes before cleaning.

Scrub molds thoroughly with the disposable mold scrubber supplied by Optical Dynamics. Never use other types of pads as mold damage may occur. Pay special attention to edges and segment line when cleaning. Rinse the molds with running water if it is available. If running water is not available, use a container of tap water to rinse the molds (change the rinse container water frequently). Spray the rinsed molds immediately with Q-Spray and wipe them dry. NEVER store a wet mold or permanent water spotting may occur.

It is very important that all molds are stored properly and organized. Each space in a mold storage drawer is labeled for one specific mold. Make sure the mold you place there is the right one.

Once clean and dry, read the mold designation near the edge of the mold and find the proper location in the storage unit. Put the mold back into its wrapper (to help protect from dirt and scratching) and gently put into the alloted space.

Hardt Eye Clinic, Saipan Celebrates 7-Years with Technology

Hardt Eye Clinic LogoOptical Dynamics is pleased to celebrate 7-years of business with Dr. Don Hardt. Hardt Eye Clinic is located in Saipain, a US Territory in the Pacific with approximately 50,000 residents. At Hardt Eye Clinic, their team strives to provide the finest in eyecare services & complete diabetes education. Patients throughout the Saipan area come to Hardt Eye Clinic because they know they will receive the personal attention and professional care that is their foundation.

As a small island nation, laboratory services for their patients was limited. Lenses and coatings were ordered  abroad with turn around times of up to 3-weeks. A strong believer in onsite lens production, Hardt Eye Clinic researched the available options deicing to add the Q-2100 Digital Lens System with nanoCLEAR AR to their practice. The quality of the progressive design, materials, and coating, along with the affordable ongoing price were key to their decision.

Ruel Balboa ImageRuel Balboa, Lab Manager, visited us in Louisville, KY lfor 3-days of lens production training. Optical Dynamics master trainer, Rafael Ortiz, joined us from Florida for the session. Ruel was a quick study producing lenses on his own the very first day. Ruel was excited to take is knowledge back to his team, offering his patients just-in-time delivery of eyeglasses.

Reduce Spectacle Remakes

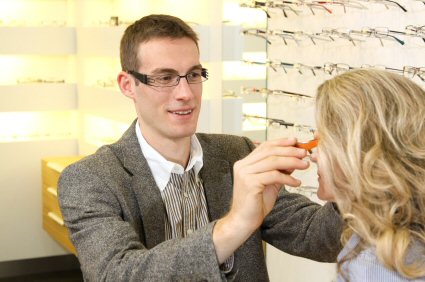
IMan Fitting Glasses on Girln an article published in Optometric Management, author and Q-2100 system owner Dr. Davis shares five steps to help optical professionals reap the benefits of providing an optimum pair of glasses. No one wants upset patients claiming they can’t see out of their new eyeglasses in a waiting room full of patients!

Step One: Double check the refraction. According to Dr. Davis, “I rarely change a prescription more that +/-0.75D so when a patient’s prescription has changed more than that amount I have found the number of remakes increase, so I always examine the patients previous refractions to ensure I haven’t made an error prior to recording the new Rx.”

Step Two: Manage the patient’s expectations. “If the patient’s prescription has changed significantly, educate them on what specifically they can expect with the new prescription,” says Dr. Davis. “And always take the time to educate first time progressive wearers,” added Davis.

Step Three: Have a well educated optical staff. “Always make sure your staff understands appropriate frame selection, pupillary distance and seg height along with proper patient positioning,” advises Davis.

Step Four: Always check lens powers. “Another way to prevent spectacle remakes is to always check the lenses your lab produces as soon as they arrive,” recommends Davis. By checking the lenses before they are dispensed you can catch any lab production errors.

Step Five: Provide a written policy. Dr. Davis recaps his recommendations with the suggestion for a written policy. “Give your patients a written policy on re-makes before they leave the office with their new spectacles. Although completely avoiding spectacle remakes is impossible, the five aforementioned tips can reduce them and result in more happy patients,” Davis adds.

Steps to Demolding

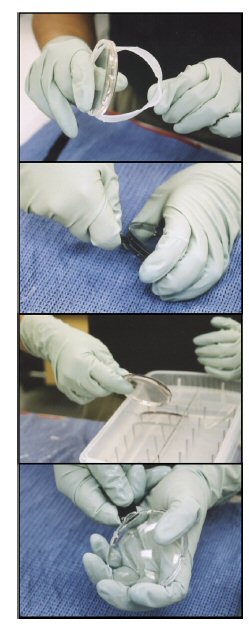
The monomer inside the cavity has been solidified during the curing cycle. Once the curing cycle is complete, the mold cavities are demolded to expose the lens surface. The assembly should be separated while still warm. Try not to “force” molds off the lens. If a mold does not release, simply return it to the soaking container and try again.

Start with the right cavity. Peel off the gasket. Wipe the edge of the lens with a lint free cloth to remove monomer residue.

Sseparate one of the molds from the assembly with the demolding tool. Insert the tool into the notch located opposite the fill port. Only use the tool as a wedge or to pry. If a mold does not come off, soak the entire assembly for at least 30 seconds in the demolding container and try again.

Put the freed mold in the soaking container for later cleaning and place the remaining mold/lens assembly to soak for at least 1 minute. The lens will release from the remaining mold.

If the last mold does not come off after soaking in the demolding container, try to gently using the demolding tool.

Put the molds in the soaking tub and the lens back in the job tray. Repeat this process for the left side. The molds should all be in the soaking tub and the lenses in the job try when you finish this step.

Made In the USA

Made in USAAt Optical Dynamics all Q-2100 and nanoCLEAR AR equipment is assembled, tested, and shipped direct from Louisville Kentucky. We manufacture all lens materials and coatings onsite. Our R&D team develops and blends all photochromics in-house.  At Optical Dynamics we are proud to be a made in the USA company.

As a Q-2100 Digital Lens System owner you are producing lenses in the USA, made with products manufactured in the USA, while providing your operator with employment in the USA. Lens products made in the USA differentiates you from most other practices in your area, so share the news. This is a great message and your patients should know it!

Changing Out Post Cure Lamps

You have received a message on the upper left side of your Post Cure menu screen that reads Service Required Press Help and are notified that its time to change your post cure bulbs.

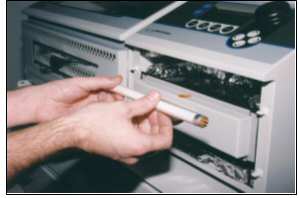
Step One: Remove the Post Cure face plate/filter panel by pulling if off

Step Two: Slide both hands under the lamps with palms facing up

Step Three: Remove lamps by twisting them 90 degrees to unlock them and then gently pull them from the lamp holders

Step Four: Install new lamps by pushing them into the lamp holders and twisting them to lock them in place.

Step Five: Make sure the new bulbs are securely installed before continuing

Step Six: Snap the Post Cure face plate/filter panel back on

Step Seven: Call Bob Miller ext. 283 or Bob Lossman ext. 276 in our Service Department to walk you through resetting the lamp timers.  800-797-2743

Promote the Products You Produce!

Now that you are processing clearLIGHT advantage, sunSMART II, blueVIEW, and nanoCLEAR  digital lenses in-house, its time to promote the products you produce!

  • Review your product literature…are you talking about the clearLIGHT, sunSMART, blueVIEW and nanoCLEAR AR products?
  • Review your on hold message…are you telling your patients about the new digital lenses you produce direct to their prescription while they wait?
  • Review your employee compensation program…does your internal program encourage your staff to sell the products you produce?
  • Review your staff training program…do all team members know how to present the  new product offering to your patients?
  • Review your target production…have you implemented a target production rate for your in-house lab?